RabbitMQ를 통한 기대 효과
- 이전 글에서 설명했던 DB 병목 현상 해결
- 글 목록 데이터를 캐시로 저장하여 DB에 부담을 줄여줌
그럼 Message Queue 중 하나인 RabbitMQ를 사용해보자
0. I/O bound 어플리케이션 실행
이전 글에서 학습했던 내용을 실제 코드에 적용해보자
2023.04.02 - [DevOps] - DB I/O bound 애플리케이션 + Message Queue
DB I/O bound 애플리케이션 + Message Queue
0. DB I/O bound 애플리케이션 성능 향상 방법 하드디스크를 많이 사용하는 파일 I/O bound 애플리케이션이라면 서버를 늘려서 성능 향상이 가능하다 하지만 보통은 DB를 사용하는 경우가 많고, DB I/O bo
tong-dev.tistory.com
RabbitMQ를 적용하기 위한 간단한 API를 하나 띄워두자
해당 소스는 내용값을 저장하고 조회하는 간단한 API 이다 (DB: postgresql 사용)
| 컬럼명 | Type |
| id | number |
| content | varchar2(255) |
/post: 저장
/posts: 목록 조회
- API 애플리케이션 환경 구축
https://github.com/lleellee0/io-bound-application
GitHub - lleellee0/io-bound-application: https://class101.app/e/Foo_Back-end_class
https://class101.app/e/Foo_Back-end_class. Contribute to lleellee0/io-bound-application development by creating an account on GitHub.
github.com
I/O bound 어플리케이션 샘플 소스는 [CLASS101+ - 현직 대기업 개발자 푸와 함께하는 진짜 백엔드 시스템 실무!] 에서 제공하는 소스를 참고하였습니다.
docker를 실행하여 postgresql를 실행하고 다운받은 애플리케이션을 실행한다
docker run --name pgsql -d -p 5432:5432 -e POSTGRES_USER=postgresql -e POSTGRES_PASSWORD=postgrespassword -e POSTGRES_INITDB_ARGS="--data-checksums -E utf8 --no-locale" postgres
- 포스트맨을 통해 /post 주소로 30번 정도 동일한 요청을 수행

- /posts를 호출하여 정상적으로 조회되는지 확인

추가로 제공 소스에 없는 페이징, 글 번호 조회, 글 내용으로 검색하는 소스를 추가했다.
해당 내용은 기본적인 JPA 코드이므로 생략. git 소스를 통해 확인
1. RabbitMQ 설치
도커를 실행하고 RabbitMQ를 실행하는 명령어를 입력
docker run -d --hostname my-rabbit --name some-rabbit -p 5672:5672 -p 15672:15672 rabbitmq:3-management
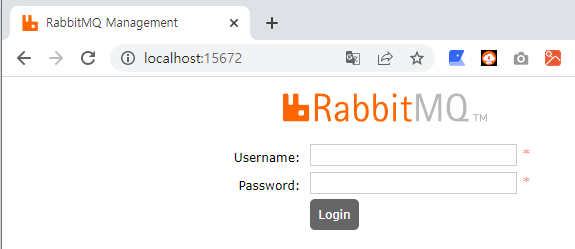
5672 포트를 통해 RabbitMQ와 통신하고 15672 포트를 통해 모니터링 할 수 있다

guest / guest 로 로그인!
(로그인 후 Admin 메뉴로 이동하여 계정을 생성하고 사용하는 것을 권장. 테스트환경이니 생략)
https://github.com/tyakamyz/io-bound-application
GitHub - tyakamyz/io-bound-application: https://class101.app/e/Foo_Back-end_class
https://class101.app/e/Foo_Back-end_class. Contribute to tyakamyz/io-bound-application development by creating an account on GitHub.
github.com
2. Queues 추가
Queues 탭으로 이동 후 [Add a new queue] 버튼을 클릭하여 새로운 Queue를 생성

생성이 완료되면 해당 Queue 이름을 클릭하여 상세 페이지로 이동한다

하단에 보면 여러 메뉴가 있는데
- Publish message: Queue에 메시지 삽입
- Get messages: 메시지 꺼내기
Publish message를 클릭하여 메시지를 삽입해보자
3. Publish message
Json 형태의 데이터를 입력하여 content를 추가한다.

"Message published." 문구와 함께 추가되는 것을 확인할 수 있다

4. Get messages
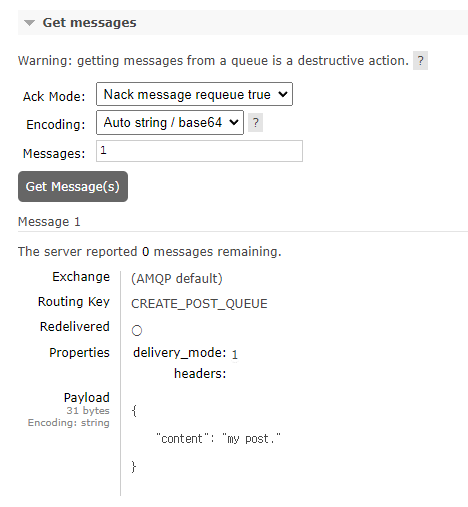
하단에 Get messages를 클릭하여 [Get message(s)] 버튼을 클릭하면
방금 삽입한 데이터가 꺼내지는 것을 확인할 수 있다

메시지를 꺼내고 표를 확인해보면

그대로 남아있는 메시지를 확인할 수 있다

Ack Mode를 Automatic ack로 변경해주면 메시지를 get 하고 잠시 후 Queue에서 삭제된다

5. RabbitMQ 의존성 추가
- pom.xml
<dependency>
    <groupId>org.springframework.boot</groupId>
    <artifactId>spring-boot-starter-amqp</artifactId>
</dependency>
RabbitMQ 의존성 추가
application.yaml
  rabbitmq:
    host: localhost
    port: 5672
    username: guest
    password: guest
RabbitMQ 설정 추가
6. Producer
메시지를 Queue에 적재하는 클래스인 Producer를 생성
- Producer.java
import org.springframework.amqp.rabbit.core.RabbitTemplate;
import org.springframework.beans.factory.annotation.Autowired;
import org.springframework.stereotype.Component;

@Component
public class Producer {

    @Autowired
    private RabbitTemplate rabbitTemplate;

    public void sendTo(String message) {
        rabbitTemplate.convertAndSend("CREATE_POST_QUEUE", message);
    }
}
- PostController.java
@Autowired
Producer producer;

@Autowired
ObjectMapper objectMapper;

// 1. 글을 작성한다.
/*@PostMapping("/post")
public Post createPost(@RequestBody Post post) throws JsonProcessingException {
   return postRepository.save(post);
}*/

// 1. 글을 작성한다.
@PostMapping("/post")
public Post createPost(@RequestBody Post post) throws JsonProcessingException {
    String jsonPost = objectMapper.writeValueAsString(post);
    producer.sendTo(jsonPost);
    return post;
}
producer 의존성을 주입받고 기존 글 작성 API를 바로 저장하는 로직에서 -> MQ에 적재하도록 변경한다


/post 요청 후 RabbitMQ 확인 결과 1건이 적재되있는 것을 확인 할 수 있다
get messages를 통해 방금 보낸 내용을 확인!

7. Consumer
메시지를 Queue에서 꺼내는 클래스인 Consumer를 생성
- Consumer.java
import com.fasterxml.jackson.databind.ObjectMapper;
import org.springframework.amqp.rabbit.annotation.RabbitListener;
import org.springframework.beans.factory.annotation.Autowired;
import org.springframework.stereotype.Component;

@Component
public class Consumer {

    @Autowired
    ObjectMapper objectMapper;

    @Autowired
    PostRepository postRepository;

    @RabbitListener(queues = "CREATE_POST_QUEUE")
    public void receiveMessage(String message) throws Exception {
        Post post = objectMapper.readValue(message, Post.class);
        postRepository.save(post);
    }
}
@RabbitListener 어노테이션을 통해 CREATE_POST_QUEUE 큐를 계속 Consumer하는 상태가 된다
해당 큐에 메시지가 들어올 경우 해당 메소드가 호출이 되고 DB에 저장한다
/post를 연속으로 호출하여 글 작성을 여러번 요청하면

Queue에 적재되었다가 사라지는 것을 확인 할 수 있다
8. 글 목록 캐싱
- PostCacheService.java
import org.springframework.beans.factory.annotation.Autowired;
import org.springframework.data.domain.Page;
import org.springframework.data.domain.PageRequest;
import org.springframework.data.domain.Sort;
import org.springframework.scheduling.annotation.Scheduled;
import org.springframework.stereotype.Component;

@Component
public class PostCacheService {

    @Autowired
    PostRepository postRepository;

    private Page<Post> firstPostPage;

    @Scheduled(cron = "* * * * * *")
    public void updateFirstPostPage() {
        firstPostPage = postRepository.findAll(
                PageRequest.of(0, 20, Sort.by("id").descending())
        );
    }

    public Page<Post> getFirstPostPage() {
        return this.firstPostPage;
    }
}
1초에 한번씩 첫페이지 목록 firstPostPage 변수에 저장하는 메서드를 생성한다
요청이 올 때마다 매번 쿼리를 실행하지 않고
getFirstPostPage() 메서드를 통해 미리 조회해서 변수로 만들어둔 값을 조회하여 DB의 부하를 줄인다
- IoApplication.java
import org.springframework.boot.SpringApplication;
import org.springframework.boot.autoconfigure.SpringBootApplication;
import org.springframework.scheduling.annotation.EnableScheduling;

@EnableScheduling
@SpringBootApplication
public class IoApplication {

	public static void main(String[] args) {
		SpringApplication.run(IoApplication.class, args);
	}

}
@EnableScheduling 어노테이션을 추가하여 스케쥴링을 사용하도록 설정
- PostController.java
@Autowired
PostCacheService postCacheService;

// 2-2 글 목록을 페이징하여 반환
/*@GetMapping("/posts")
public Page<Post> getPostList(@RequestParam(defaultValue = "1") Integer page) {
    return postRepository.findAll(
            PageRequest.of(page - 1, PAGE_SIZE, Sort.by("id").descending())
    );
}*/

// 2-2 글 목록을 페이징하여 반환
@GetMapping("/posts")
public Page<Post> getPostList(@RequestParam(defaultValue = "1") Integer page) {
    if(page.equals(1)) {
        return postCacheService.getFirstPostPage();
    } else {
        return postRepository.findAll(
                PageRequest.of(page - 1, PAGE_SIZE, Sort.by("id").descending())
        );
    }
}
1 페이지를 호출할 경우 캐시에 있는 목록을 return 한다

1초에 한번씩 조회되고 있는 것을 확인 할 수 있다
'개발 지식 > DevOps' 카테고리의 다른 글
| OLAP vs OLTP (1) | 2025.03.02 |
|---|---|
| DB I/O bound 애플리케이션 + Message Queue (0) | 2023.04.02 |
| Nginx를 통한 로드밸런싱 + 무중단 배포 (1) | 2023.03.16 |
| Jenkins 배포 환경 구축 (0) | 2023.03.11 |
| 간단한 Docker 환경 구축하기 (0) | 2023.03.11 |